How to Add Watermarks to Images
You can set watermarks and timestamps to appear on your installation’s photos.
How to Add Watermarks to Images
You can set watermarks and timestamps to appear on your installation’s photos. This feature is commonly used for you to apply branding to your images.
You can choose whether watermarks and timestamps appear only on the latest photo link photo, or both the gallery and the latest photo link.
Watermarks cannot be applied to RAW images, thumbnails, or during photo forwarding.
How to Navigate to the Watermark Settings Menu
To navigate to the menu for watermarks, follow these steps:
- Login to Control Hub.
- Select the desired gallery from the search field at the top of the page.
- Navigate to the Gallery Settings page.
- Click on the Watermark tab.
Changes made in the watermark settings menu will only apply to new photos.

Applying Watermarks to Images
Below are explanations of how each section works in the watermark settings menu. Go through each section in the order given below.
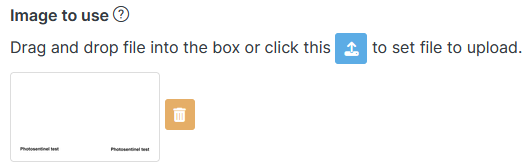
Watermark Image
In this section, you will select a PNG to be used as the watermark. You can upload the image by dragging it into the box, or clicking on the upload icon.
- A PNG file with transparent pixels for empty space is recommended.
- Tick the Generate a watermarked high-res image box if you are using a gallery that is displaying high-res images. The Discovery Gallery always displays high-res images. If your gallery uses high-res images and this box is not ticked, your watermarks will not appear.
- Size your PNGs according to the resolution of the photos they will be displayed on.
- When you create PNGs to be displayed on standard gallery photos, use a standard gallery photo as your template in your illustration software to ensure your PNG is sized correctly.
- When you create PNGs to be displayed on high-res gallery photos, use a high-res photo as your template in your illustration software to ensure your PNG is sized correctly.
Add to, Date position on preview images, and Image position
You will use these three drop-down menus to control the location/s the watermark will be applied to, the position of the timestamp and the position of the watermark.

Image position
The image position drop-down menu determines which corner the watermark will appear in.
Setting it to None will make no watermark appear.
Date position on preview images
The date position on preview images drop-down menu determines which corner the timestamp will appear in.
Setting it to None will make no timestamp appear.
Image position
The Image position drop-down menu determines the photo location/s the watermark will be applied to. There are two options:
- Latest photo link only
- Gallery and latest photo link
Choosing Latest photo link only will apply the watermark only to photos accessed through the latest photo link. Watermarks will not be applied anywhere else.
Choosing Gallery and latest photo link will apply the watermark to all instances of the photo, excluding RAW, thumbnail, and high-res versions (unless using the high-res watermark setting described in the Watermark Image section).