Scheduling – Setup and Features
Control when and how a feed captures, uploads, and checks in using the Schedule tab — sessions, weekly schedules, events, file handling, and advanced settings.
Scheduling – Setup and Features
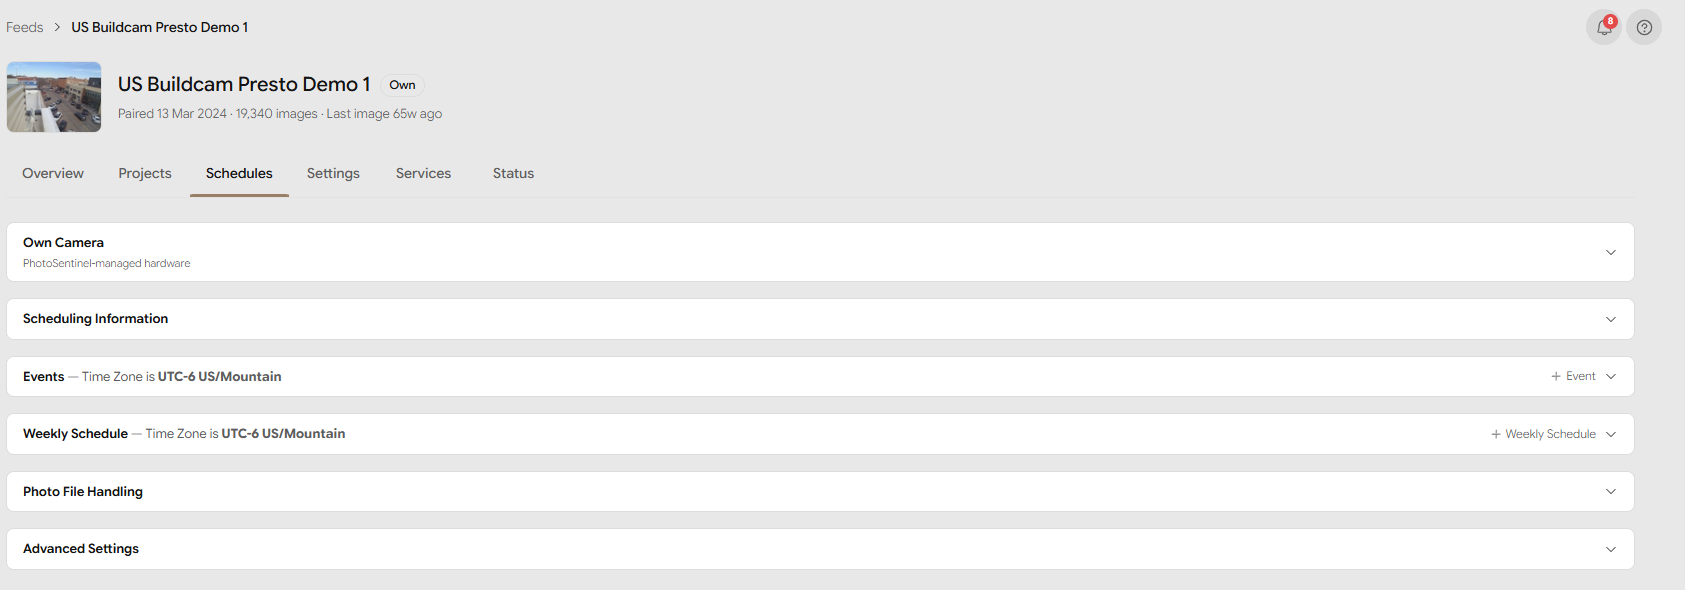
The Schedule tab gives you full control over when and how a feed behaves through the week — when it takes photos, when it uploads them, and when it checks in for status and configuration changes. You can also plan one-off behaviour for special events such as a concrete pour.
Open it from Feeds: select the feed, then open its Schedule tab.
Editing is limited to organisation admins. Everyone can view the schedule; only an organisation admin sees the + buttons and Save controls. If you don't see them, you have view-only access.
Quick concepts
- A session is a single instruction — Capture, Upload, or Check-in — that runs during a time block at a set frequency.
- A schedule is a set of sessions that runs on a day. There are two kinds: Weekly Schedule (repeats every week) and Event (runs for a date range and replaces the weekly schedule while it's active).
Setting up a standard shooting regime
A typical project shoots during business hours on weekdays. Here's how to build that on the Schedule tab.
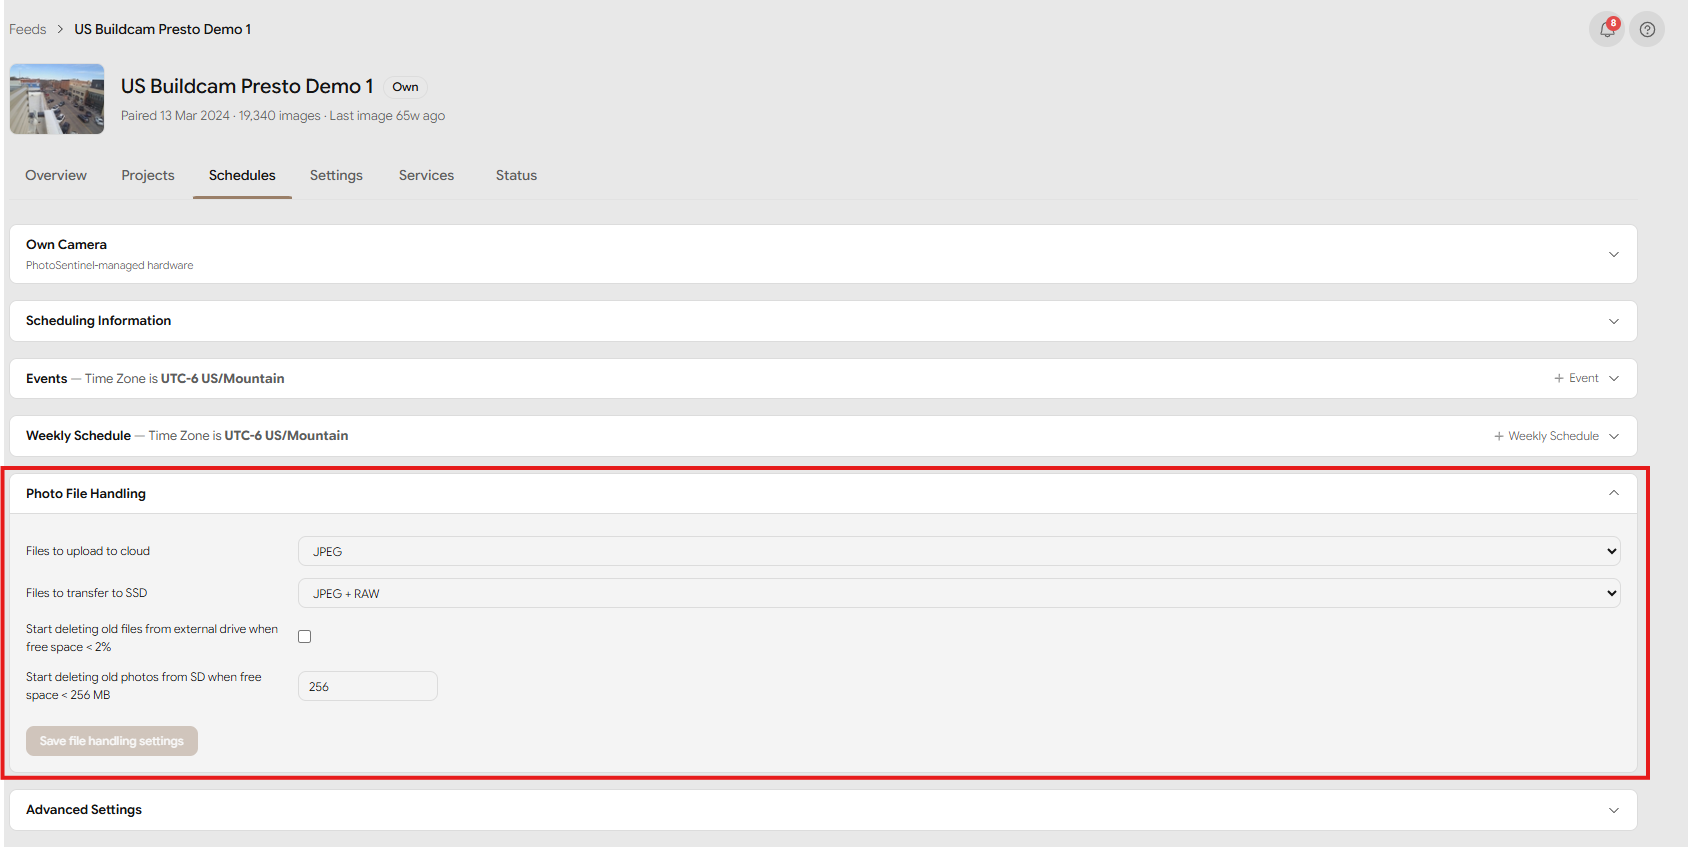
1. Set how photos are processed — Photo File Handling
- In the Photo File Handling block, set Files to upload to cloud to JPEG (the gallery displays JPEGs, and RAW uploads are large).
- Set Files to transfer to SSD to JPEG + RAW if a drive is connected.
- Tick Start deleting old files from external drive when free space < 2%.
- Set the SD-card free-space threshold (Start deleting old photos from SD when free space < … MB) to your preferred value.
- Select Save file handling settings.
2. Create a Weekly Schedule
- In the Weekly Schedule block, select + Weekly Schedule.
- Give it a Name, then select the Days it runs on (e.g. M, Tu, W, Th, F).
- Add the sessions below, then save the schedule.
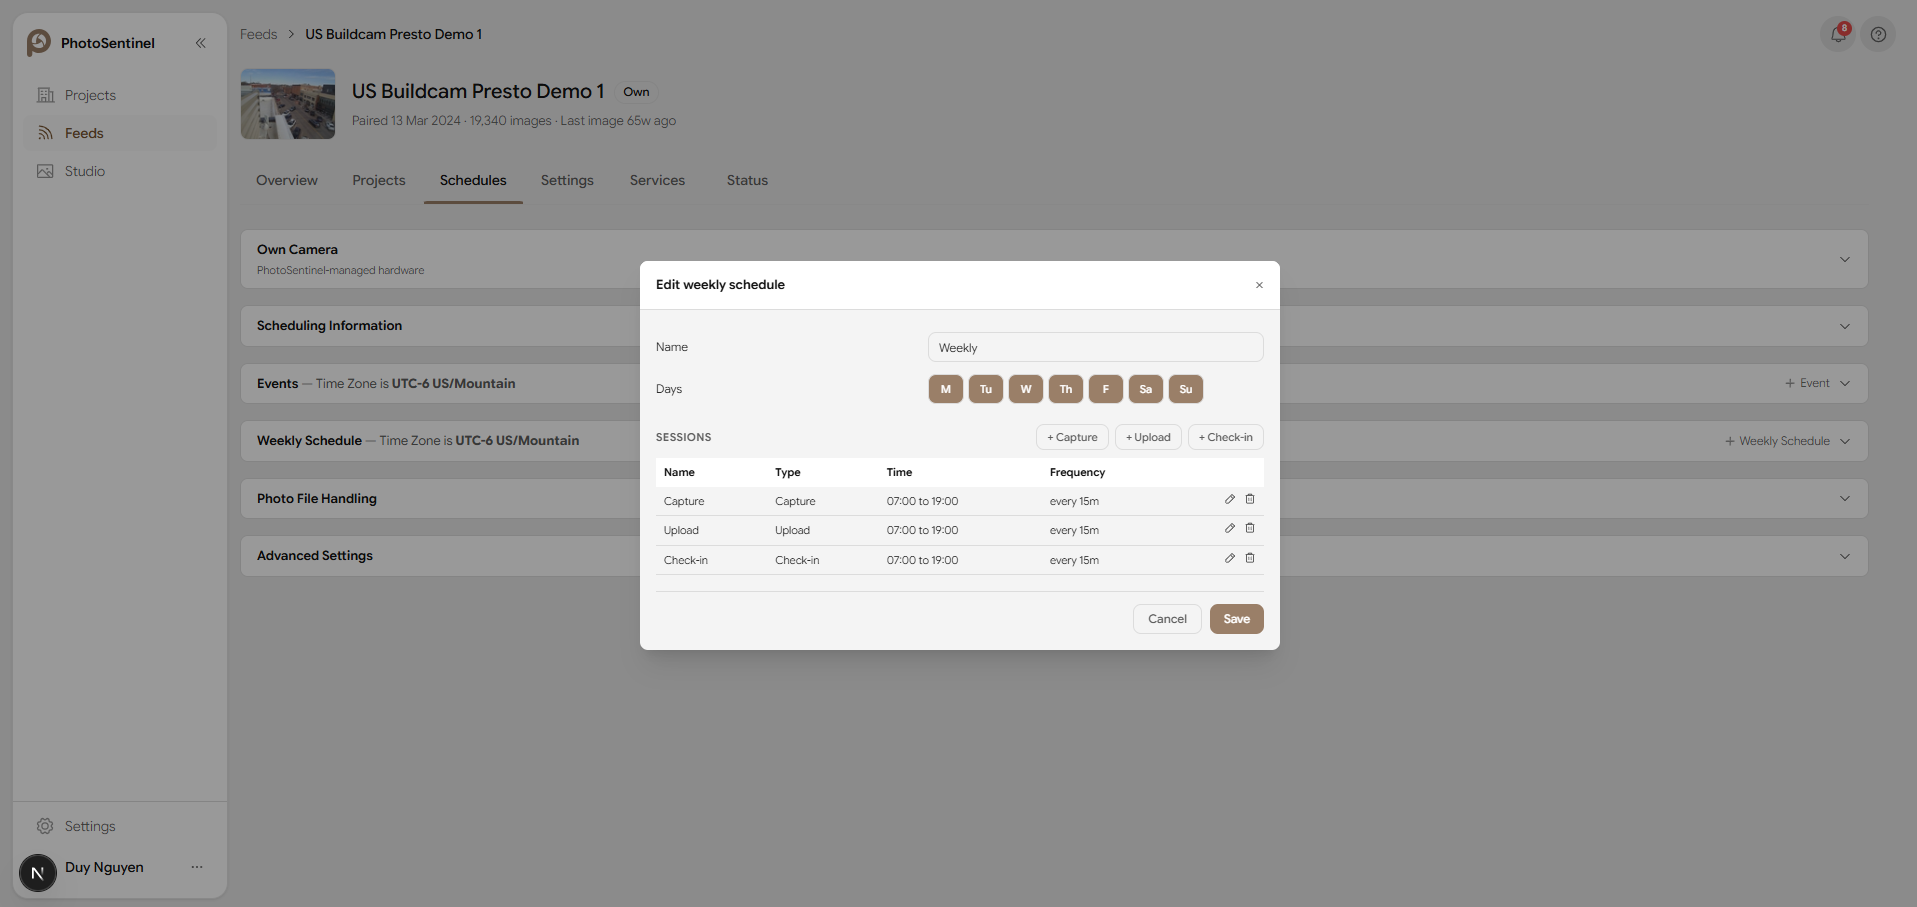
3. Add the sessions
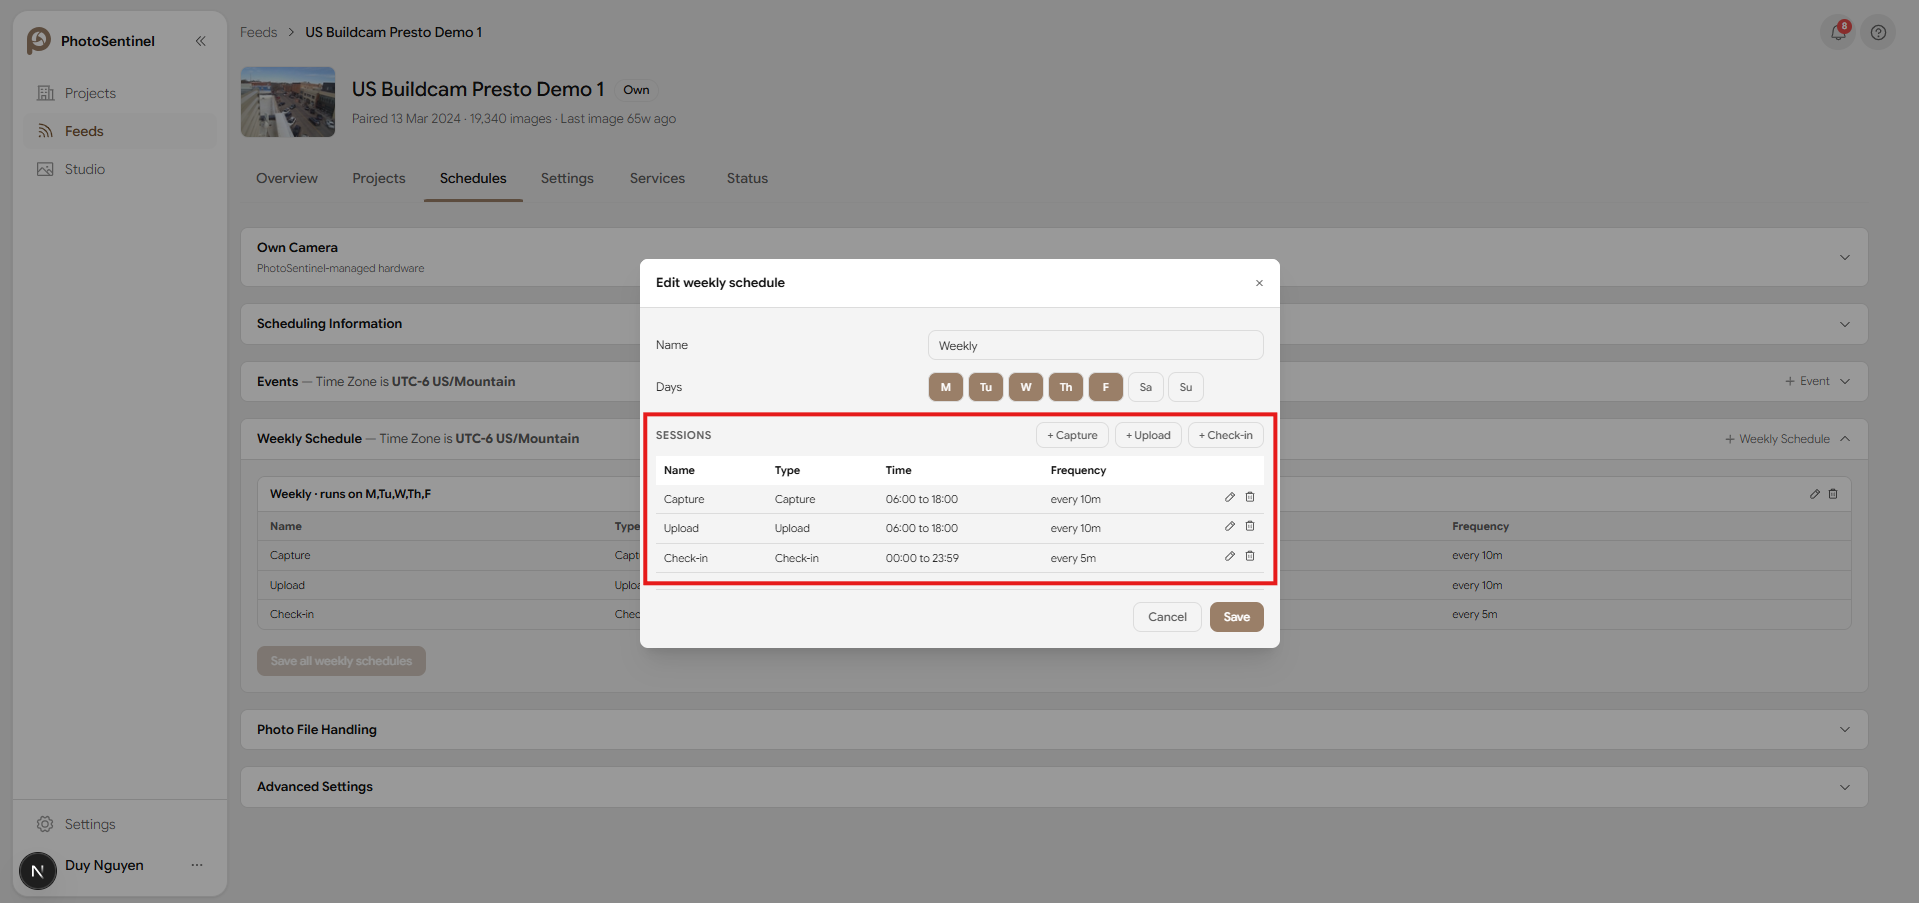
In the schedule's Sessions area, use + Capture, + Upload, and + Check-in:
- Capture — Start time
06:00, End time18:00, Frequency every 15 minutes. - Upload — Start time
06:00, End time18:00, Frequency every 15 minutes, Max photos per session set high (to upload as many as possible). - Check-in — Start time
00:00, End time23:59, Frequency every 1 hour.
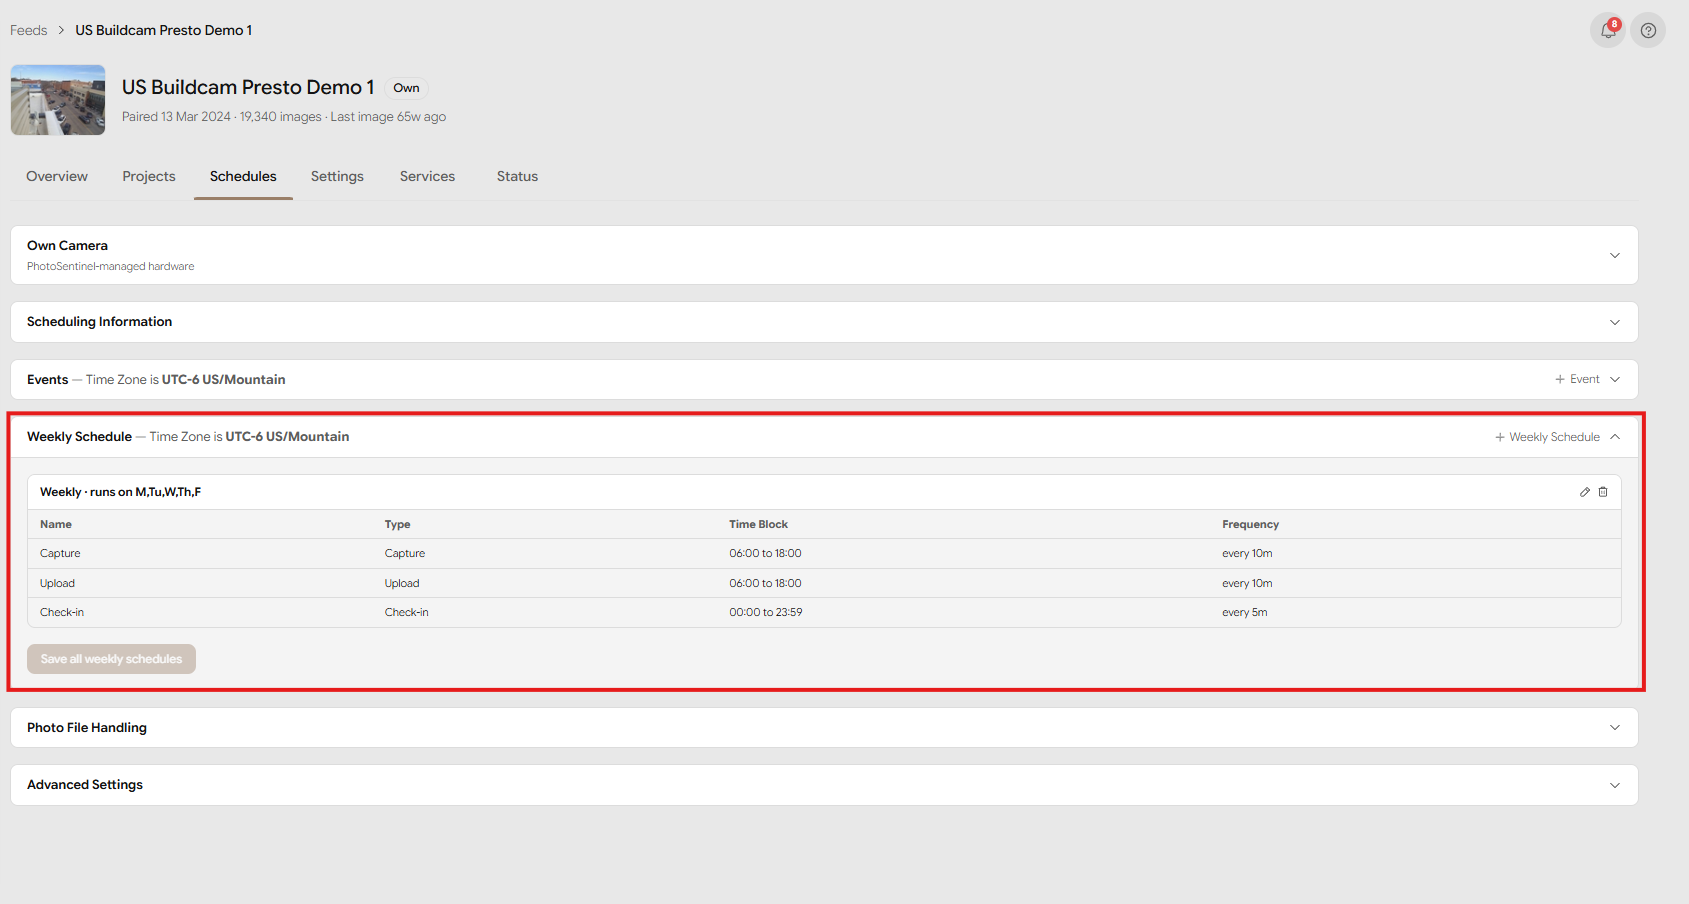
4. Save
Select Save all weekly schedules. The new schedule applies at the feed's next check-in. Each weekday the feed will then capture and upload every 15 minutes from 6 am–6 pm, and check in hourly.
Sessions in detail
Add a session with + Capture, + Upload, or + Check-in. Every session has a Type, a Start time and End time (HH:MM), and a Frequency (every N minutes or hours). Some types add extra fields:
Capture sessions
Take photos during the time block at the chosen interval.
- Low-power mode — a checkbox for short bursts of fast-interval shooting where power must be conserved (e.g. a concrete pour). Read Low Power Mode before enabling it on a live project.
Upload sessions
Upload captured photos during the time block at the chosen interval.
- Max photos per session — how many photos each upload attempt sends. Leave it high to upload as many as possible; set it low (e.g.
1) to keep the gallery current on minimal data while leaving the rest on the SSD to collect later.
Check-in sessions
Connect to the server during the time block to report status and apply any saved configuration changes. Regular check-ins are essential for monitoring feed health.
Weekly Schedules and Events
The header of both the Events and Weekly Schedule blocks shows the feed's configured Time Zone — sessions run on that zone, not your computer's local time.
Weekly Schedule
A Weekly Schedule repeats every week. Only one schedule can run on a given day; saving a new schedule onto a day that already has one moves that day to the new schedule. Within a schedule you can add as many sessions as you like (though two sessions of the same type can't overlap). Select Save all weekly schedules to apply changes.
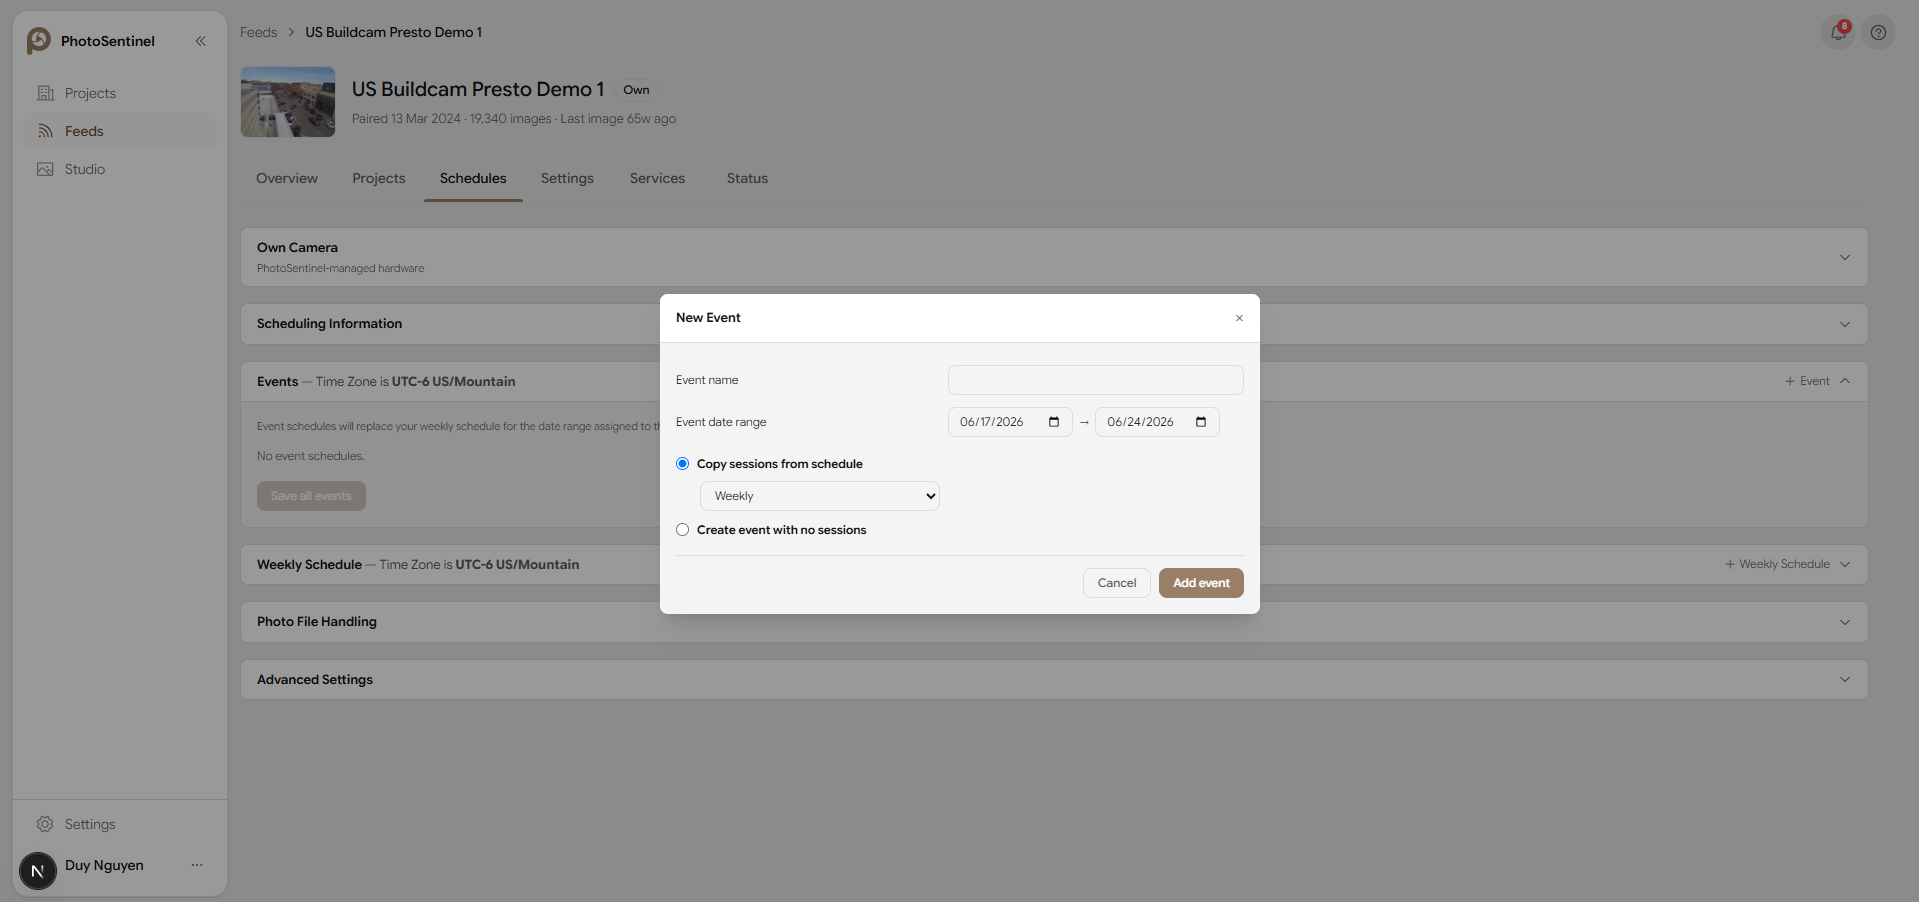
Events
An Event runs for a date range and replaces the weekly schedule for those days — so include the full set of Capture / Upload / Check-in sessions you still want, not just the differences.
To create one, select + Event in the Events block, then set:
- Event name — shown as the event's title in the list.
- Event date range — start and end dates (set both the same for a single day).
- Copy sessions from schedule — start from an existing weekly or event schedule's sessions, or choose Create event with no sessions to build from scratch.
Select Add event, then Save all events.
Overnight events
An event's sessions run within a single day, so an event that crosses midnight needs two consecutive events that meet at midnight:
- Create an event for the first day (e.g. Overnight Part 1) with sessions running up to
23:59. - Create a second event for the next day (e.g. Overnight Part 2) with sessions running from
00:00.
When Part 1 ends at 23:59, Part 2 picks up at 00:00.
Scheduling Information
The read-only Scheduling Information block summarises the current state:
- Total Photo Uploads — the estimated upload total for the feed.
- Today's Schedule — the schedule running today.
- Tomorrow's Schedule — the schedule that will run tomorrow.
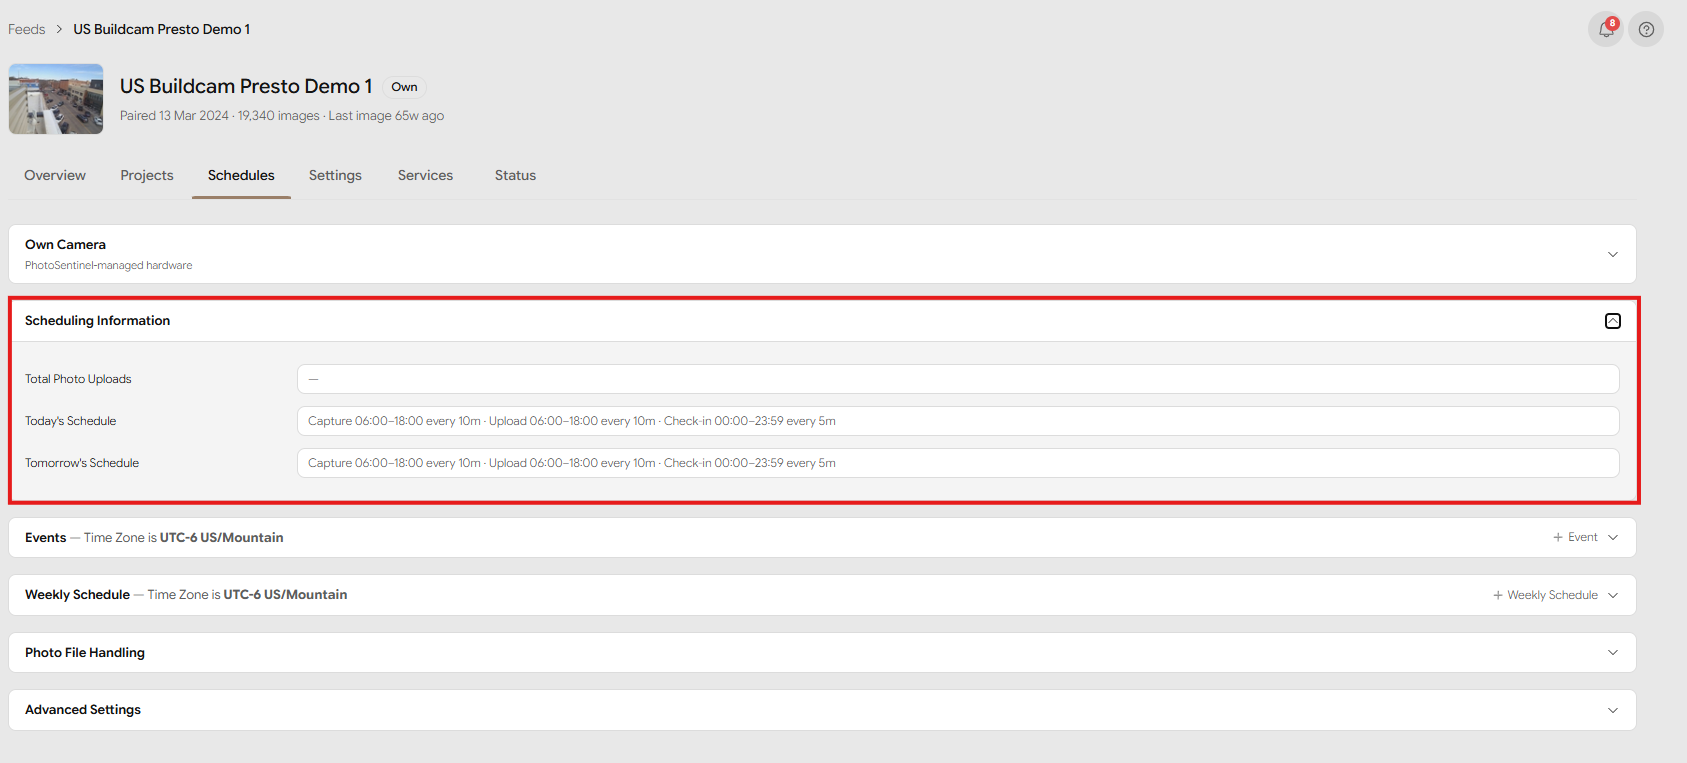
Photo File Handling
The Photo File Handling block controls how photos are processed:
- Files to upload to cloud — JPEG, JPEG + RAW, RAW, or none. The gallery shows JPEGs only, so upload JPEG to view photos online; RAW uploads use far more data.
- Files to transfer to SSD — the file types copied to a connected SSD.
- Start deleting old files from external drive when free space < 2% — when enabled, the oldest photos are removed first so new captures always have room. Deleted SSD photos can't be recovered.
- Start deleting old photos from SD when free space < … MB — keeps the camera's SD card from filling up (oldest first). SD behaviour differs under Low-Power Mode — see Low Power Mode.
Select Save file handling settings to apply.
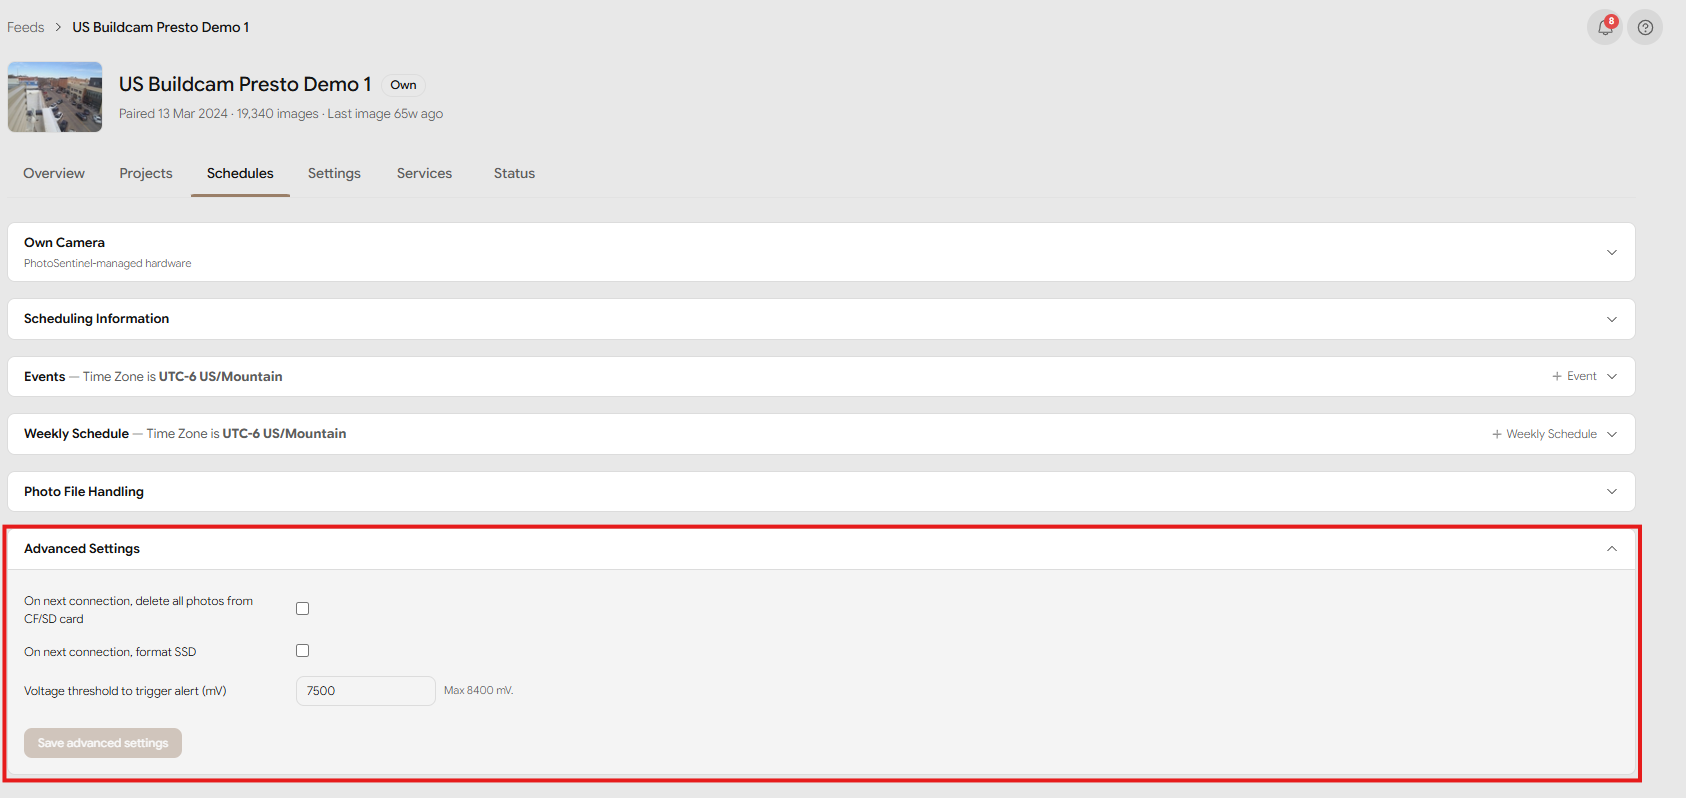
Advanced Settings
The Advanced Settings block holds the destructive and threshold options:
- On next connection, delete all photos from CF/SD card — clears the camera's card at the feed's next connection.
- On next connection, format SSD — formats the connected SSD at the next connection.
- Voltage threshold to trigger alert (mV) — the system voltage below which a low-voltage alert is raised (max 8400 mV). See Alerts System and Configure Alert for AC Power Disconnected.
Select Save advanced settings to apply.
Frequently asked questions
How many sessions can I add to a schedule? As many as you like. Two sessions of the same type can't overlap, but different types (Capture, Upload, Check-in) can share a time block.
Can each day have different sessions? Yes — create a separate weekly schedule for the days that differ.
Can two schedules run on the same day? No. Only one weekly schedule runs per day, and only one event per day. Saving a new schedule onto a day reassigns that day to it.
What happens when an event runs? The event replaces the weekly schedule for its date range, then the weekly schedule resumes once the range has passed.